
.svg.png)


WooCommerce - How to set the measurement code?
How to set the measurement code?
The measurement code is used so that you can monitor the performance of your ads, get detailed statistics and use other features to improve your results. Below you will find a simple guide on how to set up a tracking code on your online store.
1. Installation of the plugin for inserting the measurement code
You can easily add the Tanganica Pixel measurement code using WPCode's Insert Headers and Footers plugin. The plugin that allows you to add scripts to the site header must be installed first.
- Log in to the WordPress admin.
- Click on Plugins in the left menu and type "Insert Headers and Footers by WPCode" in the search field.
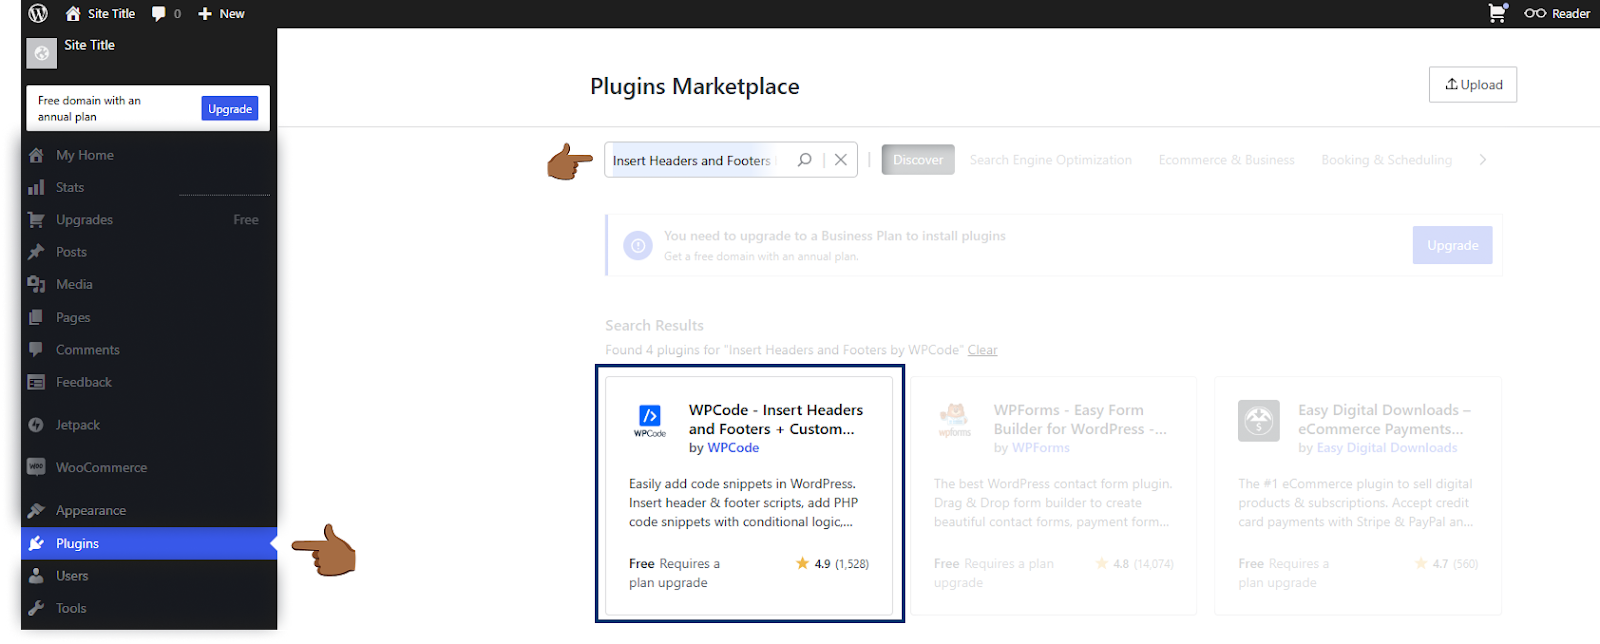
- Select the plugin in question, click Install and then Activate.
2. Inserting the Tanganica Pixel measurement code on the online store
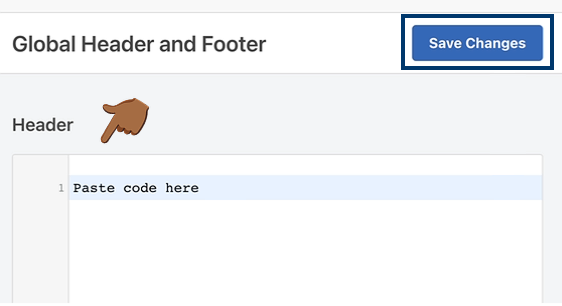
- In the left menu, go to Code Snippets → Header & Footer.
- Find the Header section and paste the following code in this field:
<!-- Tanganica pixel --><script>(function(w,d,s,l,i){w[l]=w[l]||[];w[l].push({'gtm.start':new Date().getTime(),event:'gtm.js'});var f=d.getElementsByTagName(s)[0],j=d.createElement(s),dl=l!='dataLayer'?'&l='+l:'';j.async=true;j.src='https://www.googletagmanager.com/gtm.js?id='+i+dl;f.parentNode.insertBefore(j,f);})(window,document,'script','dataLayer','GTM-TRS5RSN');</script><!-- End Tanganica pixel -->
- Save the changes made.
❗ Don't forget to test if the meter code is set correctly in the Tanganica app. ❗
What to do if the application cannot find the measurement code?
- Make sure you put the code correctly in the “Header” section.
- Verify that you have saved all changes.
- Make sure your online store website is fully functional.
If you still don't know what to do, contact our support - we'll be happy to help! 🚀