
.svg.png)


Google Tag Manager - How to set the measurement code?
How to set the measurement code?
The measurement code is used so that you can monitor the performance of your ads, get detailed statistics and use other features to improve your results. Below you will find a simple guide on how to set up a tracking code on your online store using Google Tag Manager.
Have you already created a container in Google Tag Manager?
Google Tag Manager (GTM) is a tool from Google that allows easy management and implementation of tracking codes (so-called tags) on the website without having to modify the source code of the website every time it changes.
Before you start setting up the tracking code, verify that you already have a container created in GTM. If you already have a container, just use it. If not, it needs to be created first.
How do I know if I have a container in GTM?
- Sign in to Google Tag Manager using your Google account.
- Check if you have already created a container for your online store.
💡 If you don't have a container yet, follow the instructions below to create one.
1. Creating a container in Google Tag Manager
If you have found that you do not have a container for your online store, you must first create one.
Creating a new container
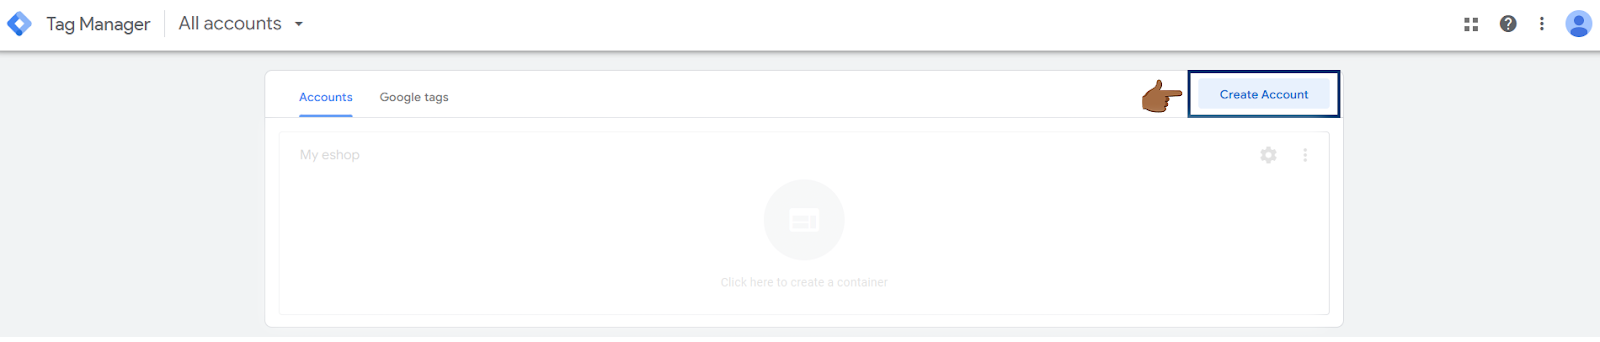
- Click Create Account.
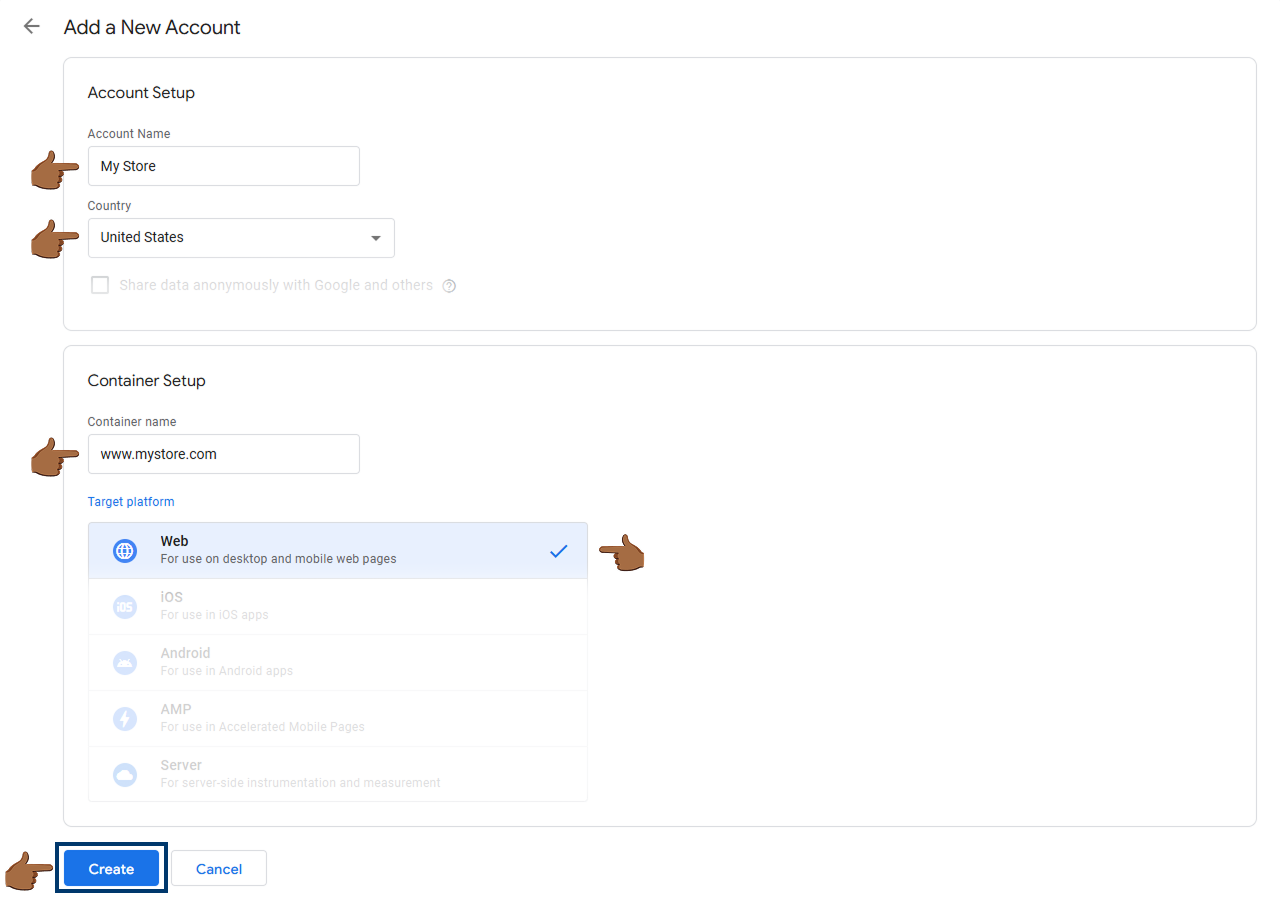
- Fill in the name of the account (e.g. the name of your company or online store) and the country.
- In the Container Settings section, enter the URL of your website.
- Select the Web platform type.
- Click Create and accept the terms of service.
Deploying the GTM code to your website
After creating the container, Google Tag Manager will show you two codes:
- The first part of the code paste into the section <head> your website.
- The second part of the code insert just past the mark <body> on all pages of the website.
2. Creating a tag for the Tanganica measurement code
Once you have the container created, you can add the Tanganica tracking code.
Adding a new tag
- In GTM, navigate to your container.

- In the left menu, click Tags and then New.
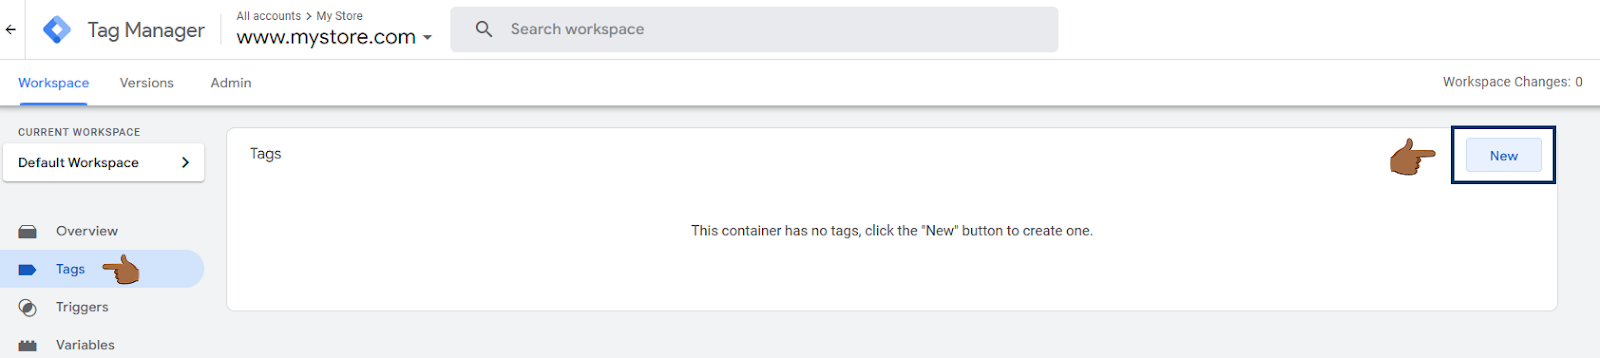
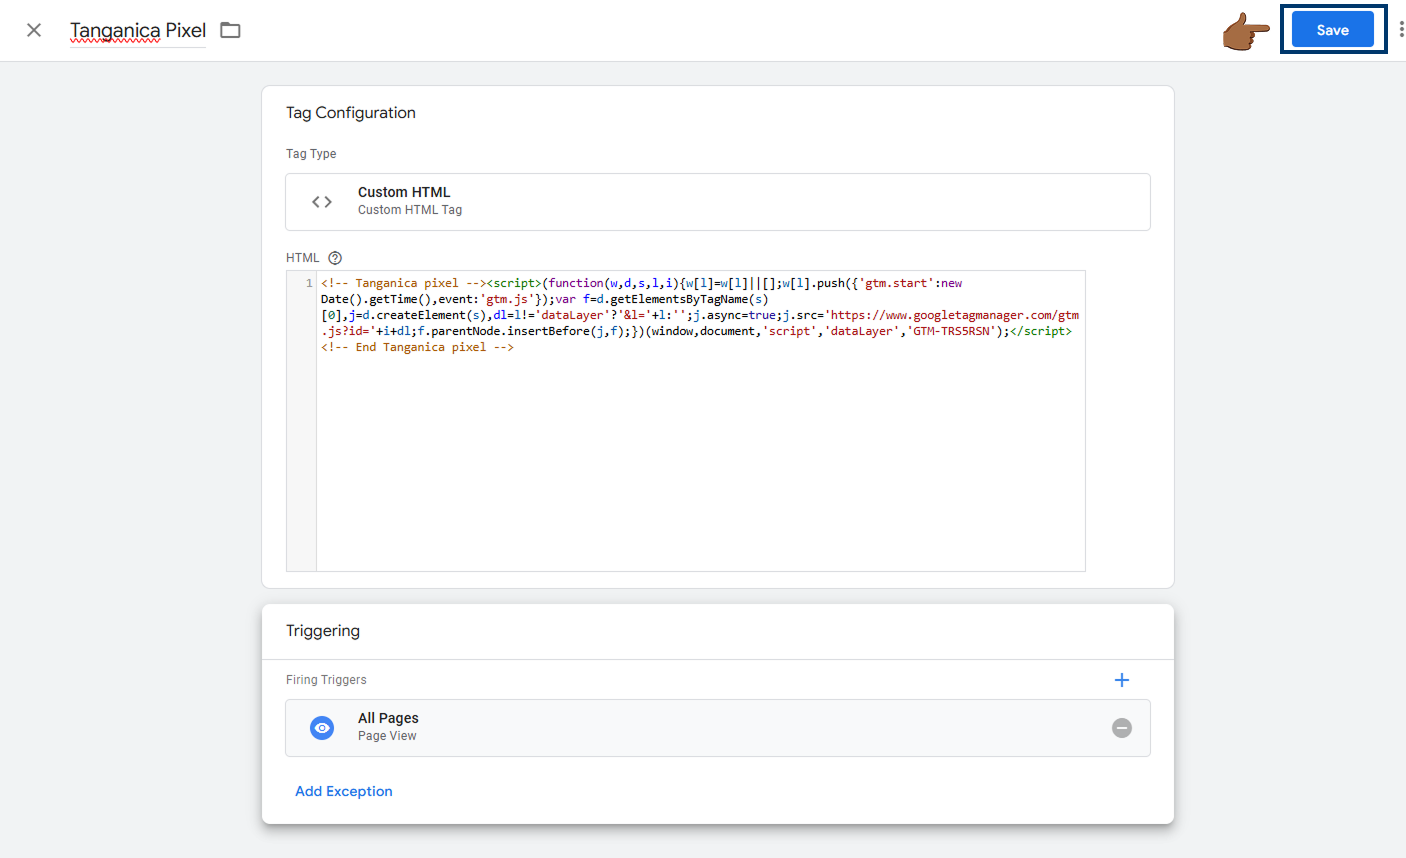
- Name the tag eg. Tanganica Pixel.
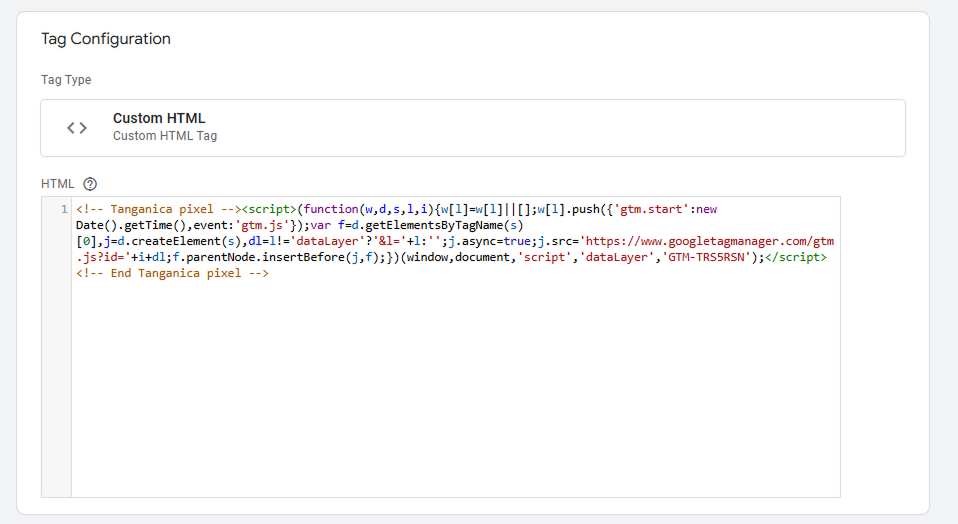
- Click Tag Configuration and select Custom HTML.
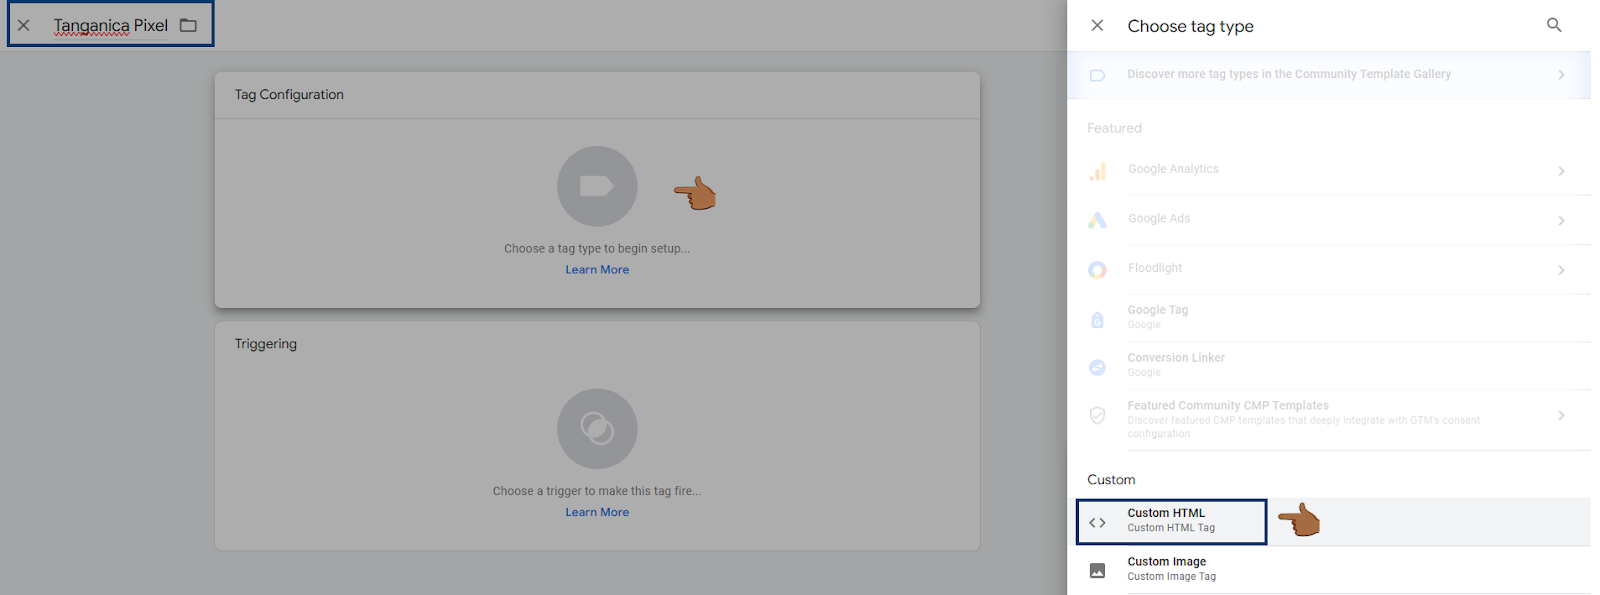
- Copy the code below and paste it into the HTML code field:
<!-- Tanganica pixel --><script>(function(w,d,s,l,i){w[l]=w[l]||[];w[l].push({'gtm.start':new Date().getTime(),event:'gtm.js'});var f=d.getElementsByTagName(s)[0],j=d.createElement(s),dl=l!='dataLayer'?'&l='+l:'';j.async=true;j.src='https://www.googletagmanager.com/gtm.js?id='+i+dl;f.parentNode.insertBefore(j,f);})(window,document,'script','dataLayer','GTM-TRS5RSN');</script><!-- End Tanganica pixel -->
Launcher settings
- Click Triggering.
- Select Page View - All Pages to run the code on every page of your website.
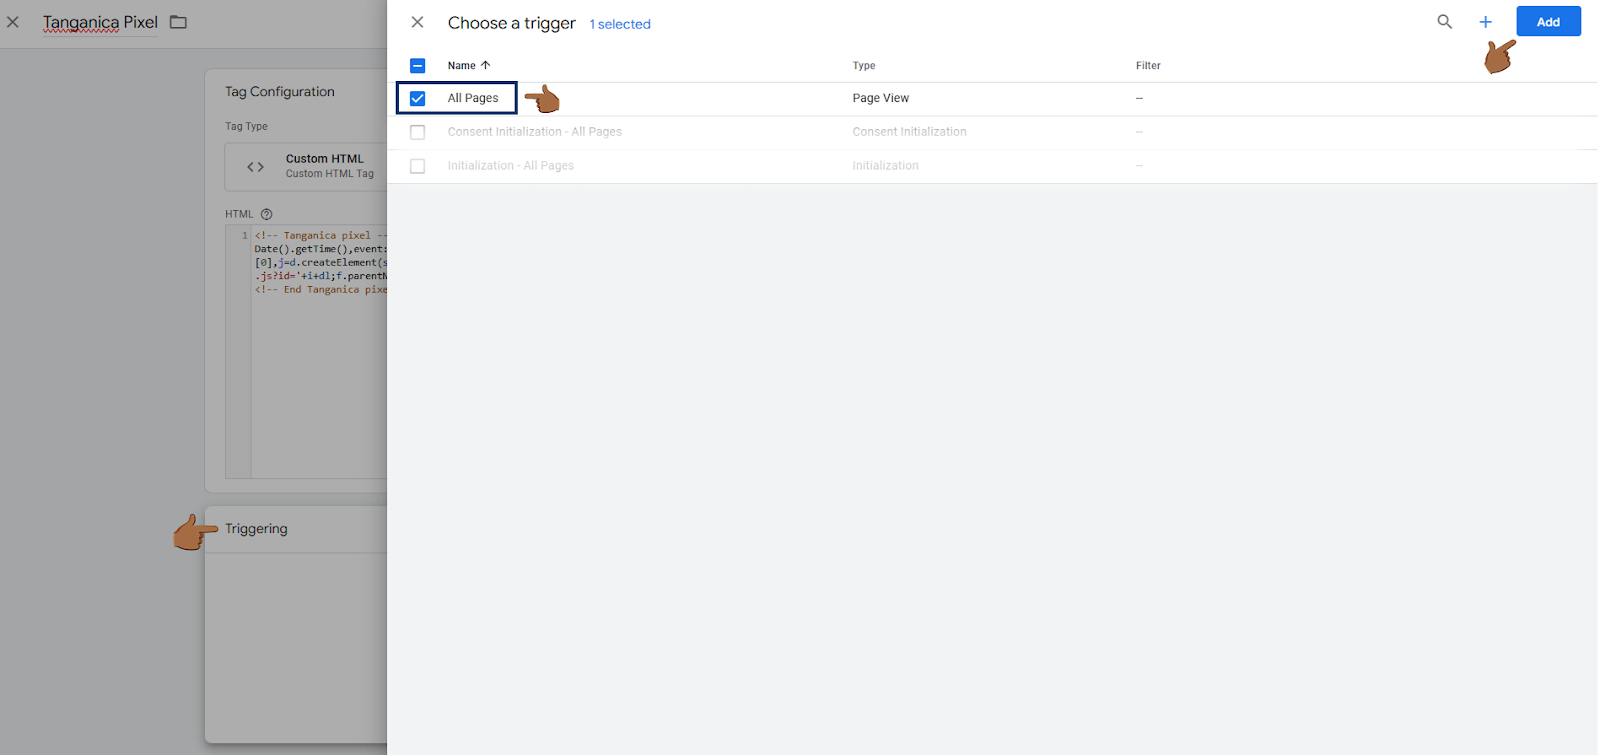
- Click Add.
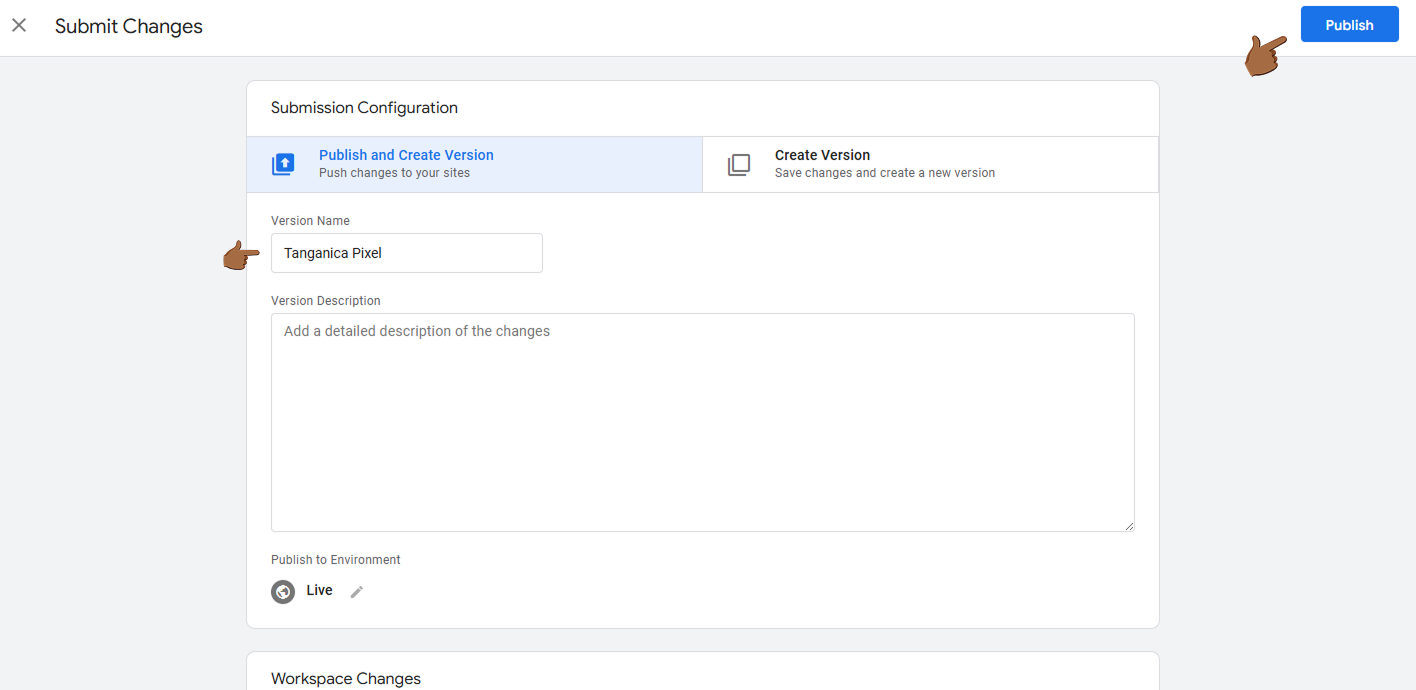
3. Publishing Changes
- Click Submit in the top right corner of GTM.
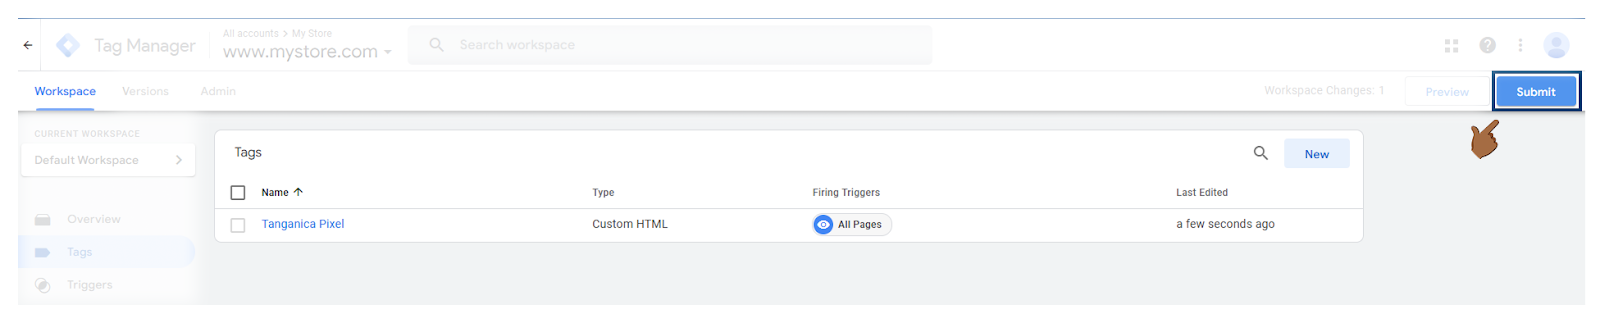
- Name your version (eg "Tanganica Pixel Addition").
- Click Publish.
❗ Don't forget to test if the meter code is set correctly in the Tanganica app. ❗
What to do if the application cannot find the measurement code?
- Verify that you are correct published changes in Google Tag Manager.
- Check if you have correctly embedded GTM container on your website.
- Verify that the trigger is set correctly All pages.
- Make sure your online store website is fully functional.
If you still don't know what to do, contact our support - we'll be happy to help! 🚀